Editor How-To
Setting up Data Tables
Updated on: November 2, 2022
Your Content Goes Here
Overview
Overview
Creating a log table has historically been restricted to clevr staff for security reasons. A recent software enhancement has improved the process to the point that any editor can create a log table using only attributes and a custom type.
Setup
Creating the Log Table
Before adding the log table to the form, you must create a container that will be the size of the log table. A log table will always position itself at the top left corner of its parent container, and expand to fill the width of the container. In this example, the container has been placed within another container that has a border style, just to visualize how the data table expands to its container.
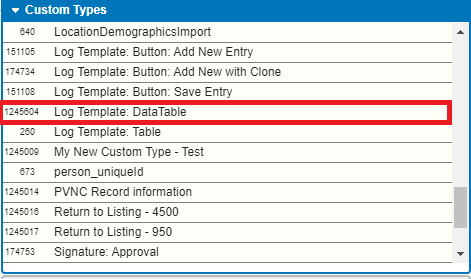
To create the log table, you must find the custom type called Log Template: DataTable in the list of custom types.
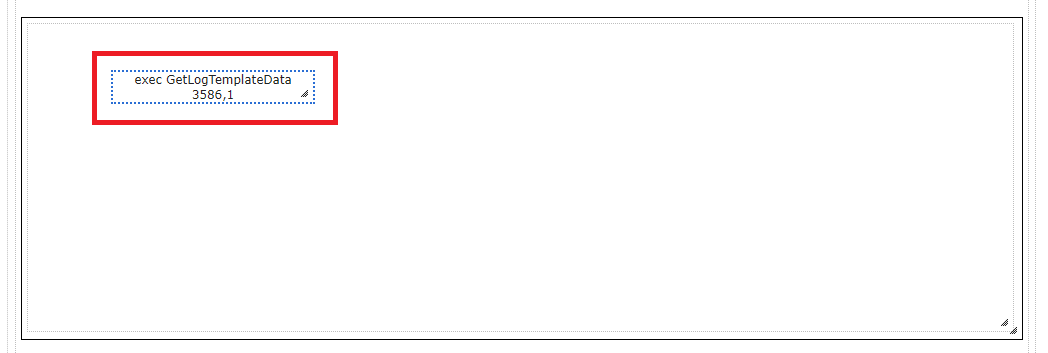
Drag the custom type into the container you created for the log table. You can drag it anywhere in the container, as once published, it will reposition itself automatically. What should be created is an element that looks like a container and contains the text “exec GetLogTemplateData {formId},1”, where {formId} is replaced with the current forms ID.
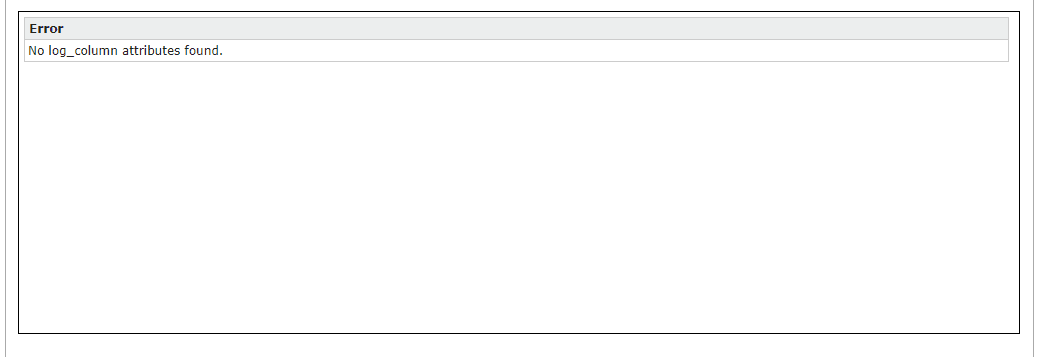
Once you have published the form, you should see the following empty log table. Until elements are specified for the table, you will receive the message “No log_column attributes found.”.
Your log table has been successfully added to the form. You can now go on to define the which elements will appear in the table.
Adding Elements to the Log Table
The first step to adding the elements you would like to the table is to plan which elements contain the data to properly identify records, along with any element that could potentially be useful to see in aggregate for a person’s records.
Below is a list of example data that can be useful for distinguishing between records in the table:
- School
- School Year
- Grade
- Teacher
- Clinician
- Date of Meeting
- Exceptionality
Once the fields have been identified, you can begin adding the following attributes.
Column Attributes
| Attribute | Value |
|---|---|
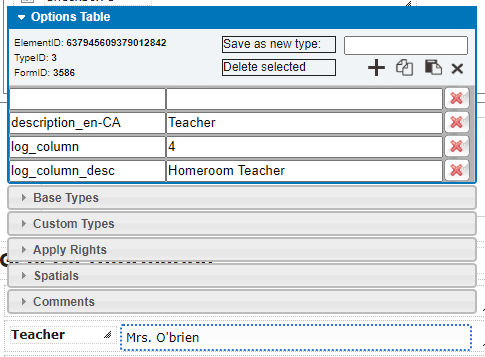
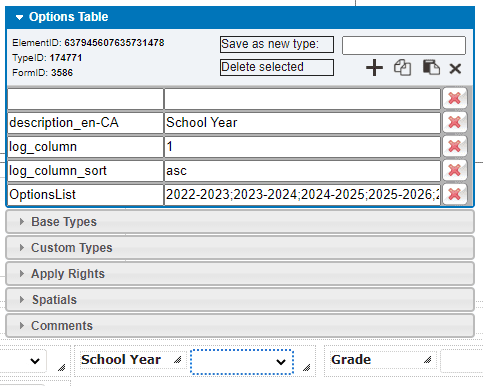
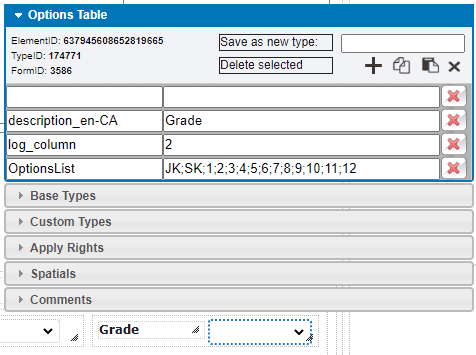
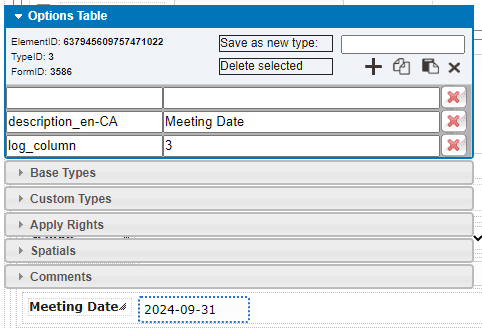
| log_column | By adding this attribute with a value, you will be adding the element as a column in the Data Table.
The attribute should contain an integer that denotes the order of the columns in the data table. If a non-integer value is entered, the column will still appear in the table, however the column order will be unpredictable. If multiple elements have the same value, then they will be sorted by their ElementId. |
| log_column_desc | This attribute provides the ability to set the column header, if it should be different from the description attribute.
If the attribute is not provided, then the description attribute will be used in the header. If no log_column_desc or description attribute are present, the column header will be “Unnamed Column {elementId}” |
| log_column_sort | This attribute indicates if the Data Table should be sorted by the values of this column.
The two possible values are “asc” for ascending and “desc” for descending. Only one element should be used to sort a Data Table. Having more than one element will produce unpredictable results. In the example, the records were created out of order, so they appear in the order of creation, with the newest records at the top, without a sort attribute on one of the elements:
With the log_column_sort “asc” applied to the School Year column, the records have be sorted from earliest to latest school year:
|

The following screenshots provide an example of a log table can be configured:

Enabling Record Controls in the Data Table
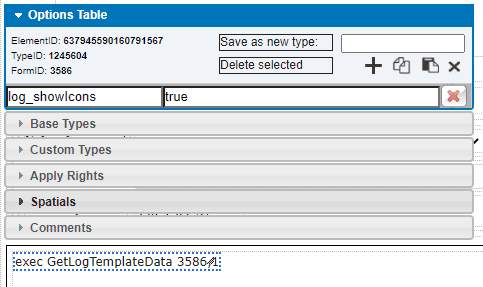
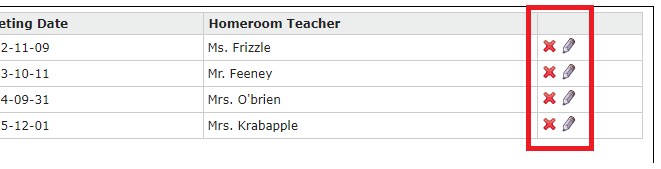
If you would like to enable your users to delete a record directly from the Data Table, then you must apply the attribute “log_showIcons” to the Data Table element with the value of “true”.
Restrictions
- There can only be a single set of columns defined for a Data Table. While many Data Tables can be placed on a form, they will all show the same set of columns.
- Data Tables will not push down elements that appear below them on a form. If a Data Table contains enough records, it can expand to overlap any elements below. For this reason, we recommend the following placement on a form:
- At the bottom of a tab.
- Within a dedicated “Record History” or “Log Table” tab.
- In a side-by-side configuration with the Data Table on one side and elements on the other. In this configuration, it would be best to not have any elements below the Data Table. This layout is best used when a form will have many records that have a limited number of elements.
- Less ideally, with enough blank space below to provide ample room to expand for the expected number of records. This approach can work on forms that have a predictable number of records, such as yearly assessments where a student should only have a single record for each year of their education.
- A Data Table can not be repositioned with its parent container, and its width can not be changed from the width of its parent container. For this reason, it is best practice to provide a Data Table a dedicated container to control its spatials.
- The Data Table Header will only use the “description_en-CA” attribute, regardless of which language is selected in a user’s profile. For that reason, if you require multiple language support in a Data Table, it is best to specify a “log_column_desc” attribute with both languages included.