This section will walk you through some basic navigation tips and tricks.
Starting a New Form From Within a Record
You are able to start a brand new form for a student while you are within an existing record without the need to go back to the Homescreen.
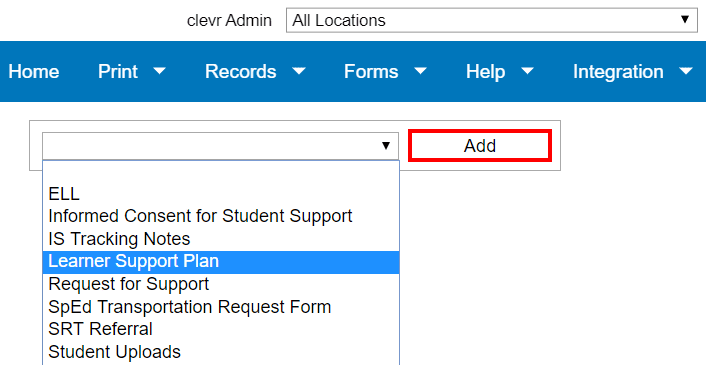
While you are within their record, locate the dropdown shown below on the right hand side of the page. Clicking on this dropdown will show you all the forms you have access to. Simply select the form you would like to begin and press Add.

If the student does not have an existing record for this form, a new one will be started. If there is an existing record already you will be taken to it.
Quickly View Another Form
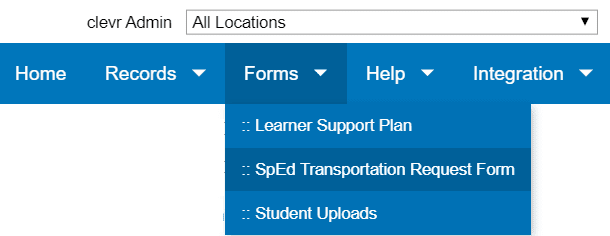
While you are within a student’s record, you can see which other forms a student has a record for by clicking on the Forms menu button. Select a form from this dropdown to be taken to that record.

Moving to the Next Student
While you are within a student’s record, you can move to the record of the next student on the list without going back to the Homescreen. Click the Next or Previous buttons shown below to move to the next/previous student (alphabetical order). You can also enter the name of a student in the text area to the right of these buttons to open their record for the selected form.

Email Icon
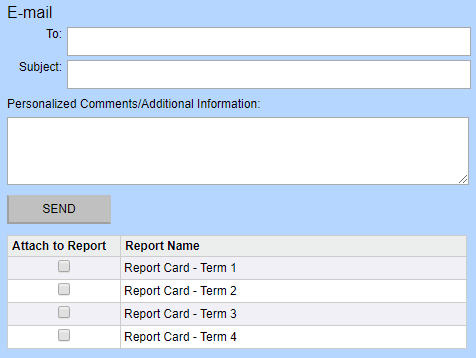
The Email icon can be used to send a printout to another user within your district / division. For security purposes, a printout can only be sent to an email address associated with a clevr account at your district / division.
In the “To” field, type the first few letters of the email you would like to send the printout to. This field contains an auto-complete feature so that only email addresses associated with clevr accounts can have reports sent to them. You can enter a subject line and a message, then select which report you’d like to attach to the email.

Undo Button (NOT a Save Button)
The Undo button is a feature that allows you to undo the last three items that you entered into clevr. These items can be the contents within a textbox, a dropdown selection, or a date. You can find the Undo button next to the spell check button on the top right corner of any form.

Spell Check
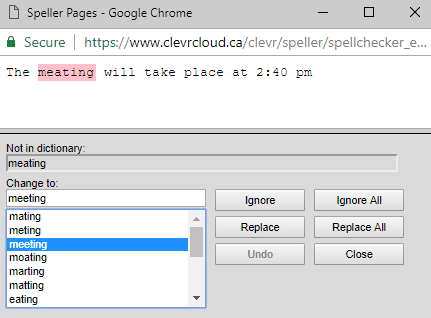
Use the Spell Check tool to check the spelling of data you have entered within clevr. This tool is located in the top right corner of any form. If a spelling mistake is found you will have the option to change, ignore, or replace the word in a pop up box. (Note: You must have pop ups enabled in your browser to use Spell Check).


