In the Form Editor
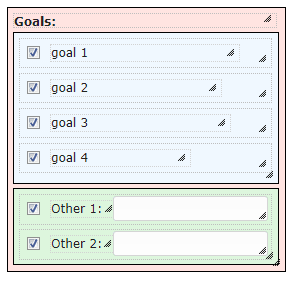
If you wish to have logic which treats some checkboxes differently than others – but keep them in the same group – they must be in a separate container within the groups container. In the example below we can see a group of checkboxes within a red container. The checkboxes are then further categorized into those without the extend attribute (blue container), and those with it (green container). The colours are just there to help visualize and are not required.
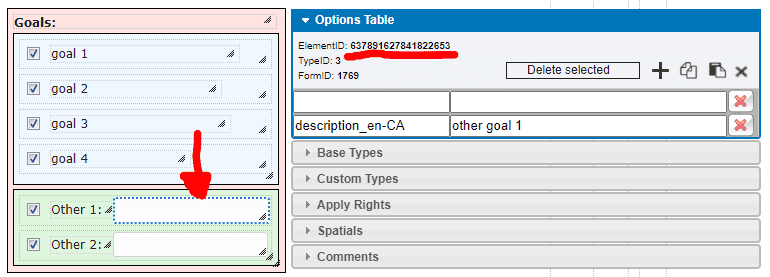
To apply the extend attribute to the “Other…” checkboxes you must first get the id of the textbox you wish to associate with the checkbox.
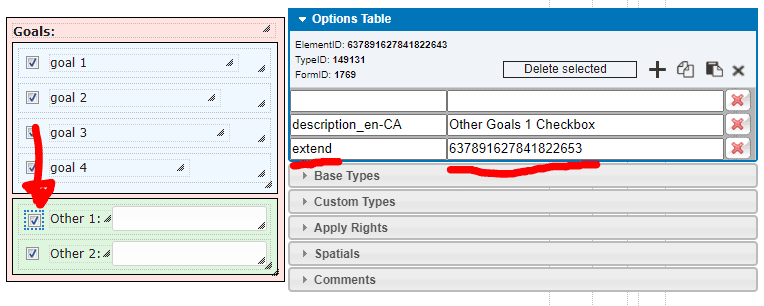
You then select the checkbox, apply the extend attribute, and use this id as the value.
Once this step is completed and the checkboxes are all set up, it is a good idea to publish the form in order to save your work. Once published, head back into the editor.
In the Report Editor
Now that the form is all set up, click the blue button at the top titled “Report Editor”. From the list of reports, select the one you want to work on or click “Create New Report”.
In order to keep all the checkboxes grouped under one heading, and to show the group only if there are checkboxes selected, an If Not Blank Container logic piece will be used. The id’s referenced for this logic piece will be the entire blue container, as well as the individual checkboxes in the green container. It is important to note that the checkboxes in the green container are being used as opposed to the whole container, as this way if a checkbox is not selected but there is data in the text field, the section will still be hidden. Example:

The next step is to add the header for the group as well as the required Untitled Table’s for the checkboxes. The following is just one example of how to complete this, however you can achieve the same or a similar result with different methods as well. This method is useful when you desire to apply Keep Together to the checkbox group.
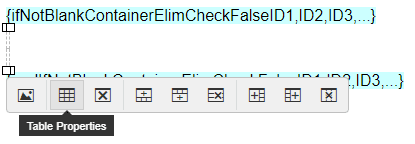
Start by adding a 1×2 table in the content section inside the If Not Blank Container and select Table
-
Set the Width to 100%, set the Cell padding to 3. Then click on Advanced and in the Style box type (without quotes): “border:1px solid black;”. Click Ok.
-
In the top cell of this table add the header text/styling for the group. In this example we will use “Goals” in bolded text.
-
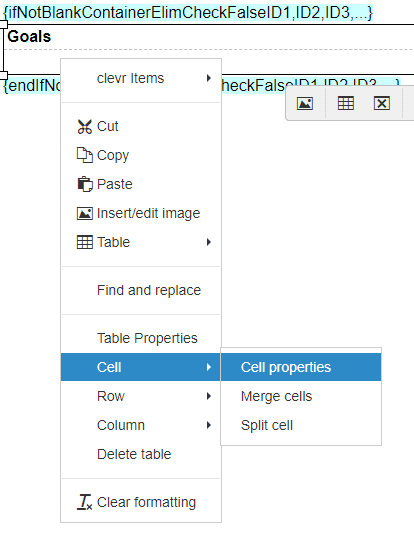
Right click on the bottom cell, navigate to and click on Cell properties.
-
Click on Advanced and in the Style box add the following (not including quotes): “padding:0px;” and click Ok.
-
Click on the bottom cell and add two If Not Blank Container logic pieces. Example:

-
The id for the first logic piece will be the id of the blue container, and the id’s for the second logic piece will be the id’s of the special checkboxes. Inside of the first If Not Blank Container logic piece will be the checkbox table for the basic checkboxes (blue container) and inside of the second If Not Blank Container logic piece will be the checkbox table for the special checkboxes (green container).
-
To make the first checkbox table, from the Checkboxes & Radio Buttons drop down, select Untitled Table. Replace the “#” symbol with the id of the basic checkbox container (blue), and change the text within the quotes to just be false/true. “false” will show only the checkboxes checked in the container while “true” will show all checkboxes indifferent to whether they are checked or not.
-
-
On the next line underneath the new Untitled Table. Create a 1×1 table. Enter the Table Properties for this table and set the Width to 100% and the Cell padding to 3.
-
Click inside this table and navigate back to Checkboxes & Radio Buttons. Click Checkbox Image, add a space, go back into Checkboxes & Radio Buttons and click Checkbox Description. (If there were no special conditions for the checkboxes with the extend attribute, within this table you would add a Checkbox Extension and would only need the one Untitled Table). The group of basic checkboxes should now function properly.
-
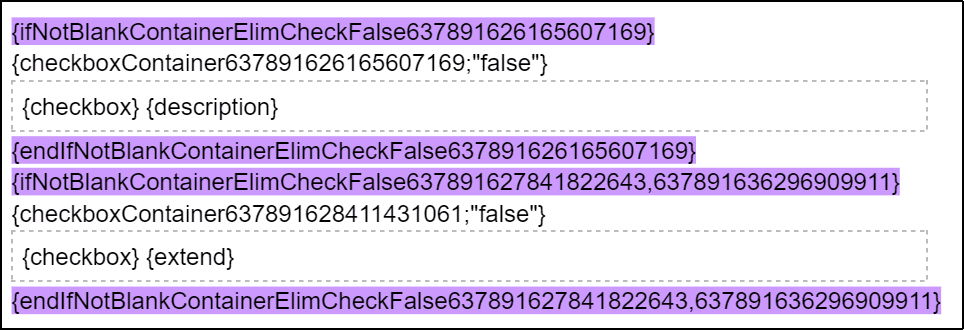
Within the second logic piece is where the conditions for the special checkboxes comes into place. These next steps will change depending on what you are specifically trying to accomplish. This document will outline how to show only the text fields that are associated with each special checkbox. The first step is to repeat step 6a/7 within the second logic piece using the id of the special checkbox container (green container) for the Untitled Table.
-
Click in the new table and navigate to Checkboxes & Radio Buttons. Click Checkbox Image, go back to Checkboxes & Radio Buttons and click on Checkbox Extension. Example:
-
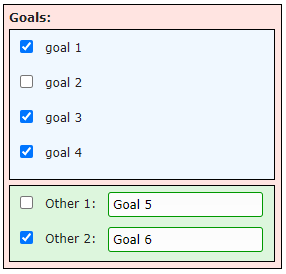
The table should now be set up to show the header only if at least one of the checkboxes are checked, it will show only the checkboxes that are checked, and will display only the data in the text field for the special notifications. Example:

Note: If there is only one special checkbox then it is not necessary to use an Untitled Table. For step 6, the second logic statement will use the single id of the special checkbox. Within that logic statement create a table using the standard properties (Width 100%, Cell padding 3). Within this table add the following from Checkboxes & Radio Buttons: Standalone Checkbox Image and Standalone Checkbox Description. Use the id of the special checkbox in place of the “#” symbol and choose whether you want “true” or “false”.

