Person Management Module
| Table of Contents |
Overview
The Person Management Module provides administrators the ability to create, update and verify user accounts.
Before we begin, it’s important to know the difference between user accounts and what we call persons.
Assigning and modifying 1) forms, 2) locations, and 3) roles is easy with improved search and filter functionality. Reset passwords or reviewing a user’s access is simple. Utilize the Help Tips within the module.
- Person: Person means a student, staff, school, parent, or vendor. A person means a student, staff, school, parent, or vendor that does not log into clevr.
- User: User or User Account means a person logging into clevr.
![]() Page rights
Page rights
To access this feature, the Person Manager page right is required. If your role needs the ability to insert persons you will require the Person Manager – Add Person page right, and if you need access to configure Linked Accounts, you will require the Person Manager – Linked Accounts page right.
![]() Common usage
Common usage
This feature is used by System Administrators to manage user accounts.
![]() Considerations
Considerations
Best suited for system administrators, not end users.
Accessing the Person Management Module
From the clevr Dashboard, click on the Configuration Menu > Person Management.

Person Search Card
The Person Search Card provides the ability to search for a user based on your chosen search criteria. By default, the status field is set to active and the first name field is selected with no criteria defined.
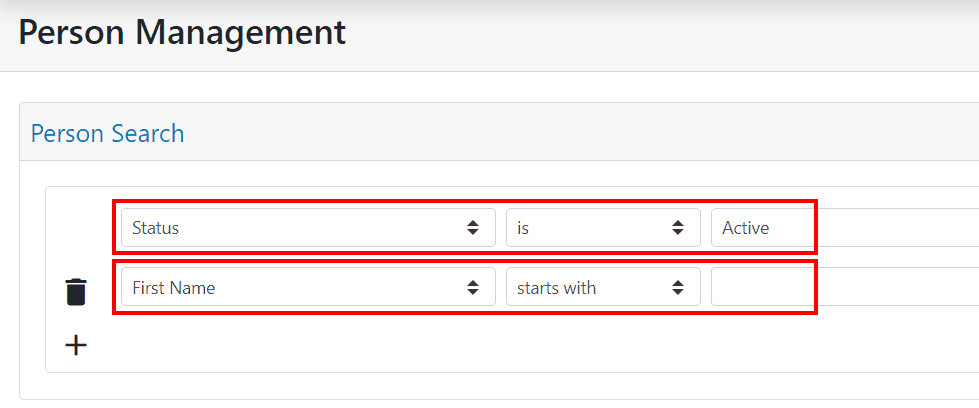
Using the Search Filters in the Person Management Module
To locate a person record within clevr, use the Person Search fields to specify and narrow down your search results. When adding your criteria, the following can be used for your search:
| Filter Name | Filter Description |
|---|---|
| Status | Can be set to either Active or Inactive |
| Last Name | Preferred last name |
| First Name | Preferred first name |
| Legal Last Name | The last name of the person that is recognized on official records |
| Legal First Name | The first name of the person that is recognized on official records |
| Proprietary ID | The Proprietary ID is a unique numeric ID that is associated to a person within the Source system and is used to match the person within the source system to the person in clevr. If the User Account will be managed within clevr, and does not exist within your source system, we recommend that 999 is added to this field and the clevr Managed field is set to True. |
| Local ID | The Local ID is a unique ID that is associated to a person. If the Source System does not have a Local ID associated to the record, the Proprietary ID is used to match the person in the Source System to the clevr person. If the User Account will be managed within clevr, and does not exist within your source system, we recommend that 999 is added to this field and the clevr Managed field is set to True. |
| Role | Identifies the level of access the user has in clevr. The role determines which forms and modules the user will be able to access. |
| User Account | Use the Checkbox to search for person records that have a user account assigned to them. Leave the checkbox empty to search for person records that do not have a user account associated to them. |
| Username | The ssername that is used to log into clevr for that user account. If your district or division uses LDAP for your login authentication, the username they use will be present within the AD/SAM account name field, not the username. |
| Manually Managed | Use the Checkbox to search for accounts that are managed within clevr (not updated by your SIS integration). Leave the checkbox empty to search for accounts that are managed by your SIS integration. |
| Location | Used to search accounts that have been assigned to a specific location. |
| Form | Used to search accounts have been granted access to a specific form. |
| Default Form | Used to search accounts have been granted access to a specific form and that form has been set to their default form. |
| Landing Page | Used to search accounts that have been assigned to a specific landing page (example, Legacy, Legacy Dashboard, Any New Dashboard, Dashboard Template: (Name of Dashboard). |
| Allow clevr Login | Used to filter for user accounts that have the ability to use a clevr username and password. This setting should be unchecked for all accounts and tenants using third party login such as SSO, LDAP, ADFS, etc. |
The “+” icon will allow you to add additional fields to your search.
If you wish to remove a field, click the “Trash Can” icon next to the field that you would like to exclude.
Once you have entered in your search criteria, click the Apply button located in the top right hand corner of the Person Search Card. clevr will generate a list of results based on the search criteria you have entered.
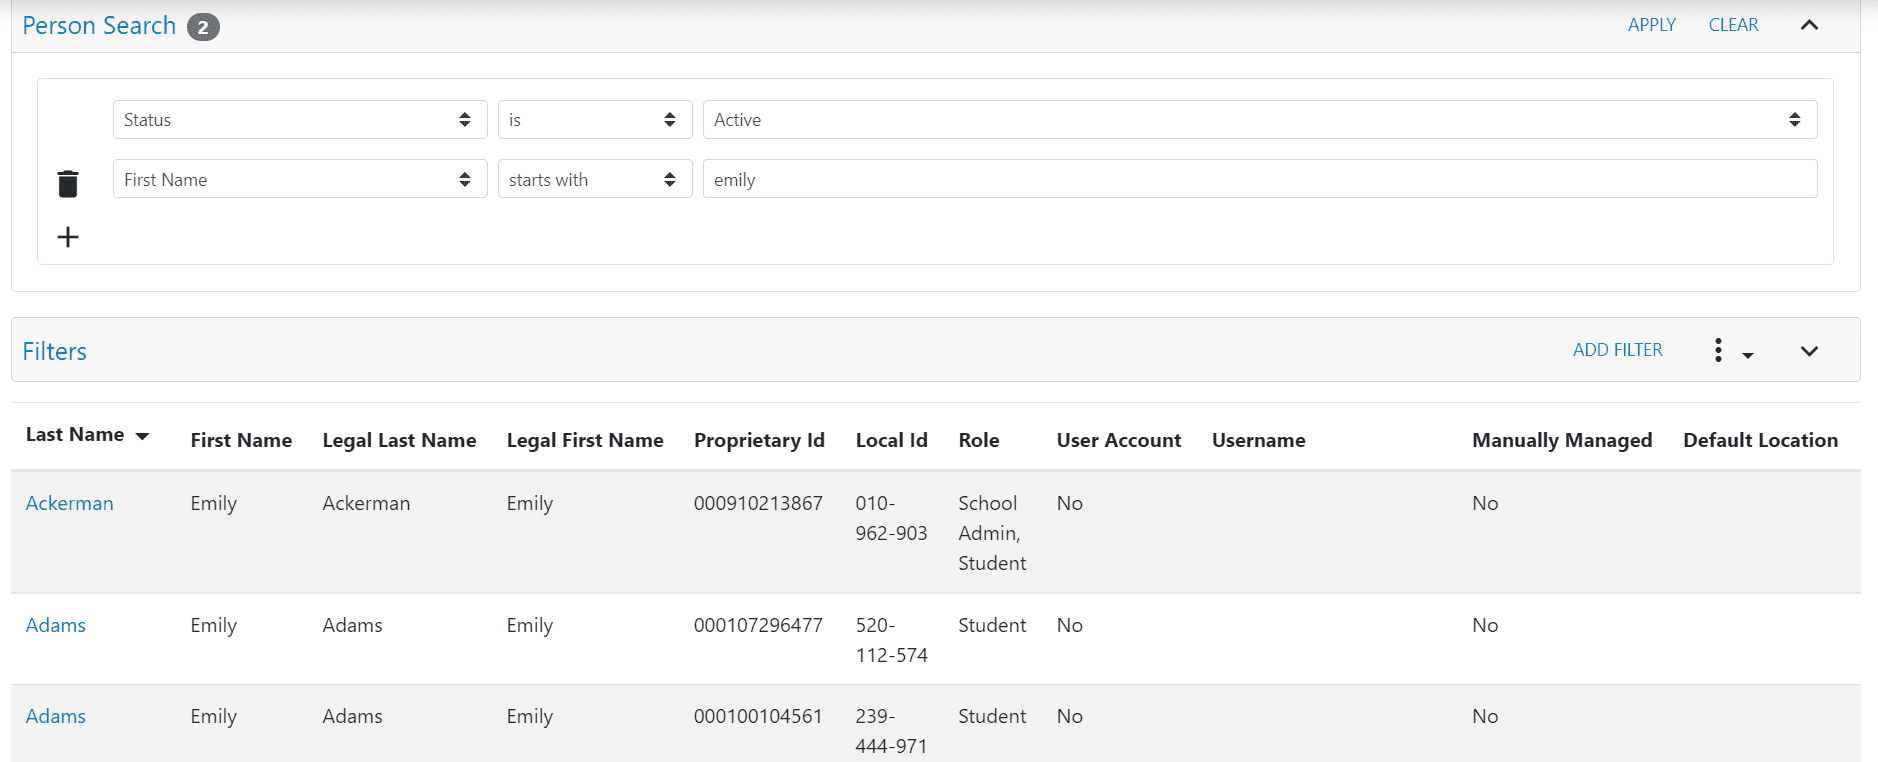
Adding a Person
The Add Person button within the Person Management header will allow you to add a new Person to clevr.
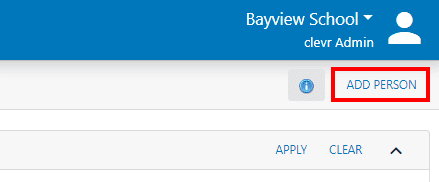
Clicking “Add Person” will open a pop up window where you can enter the details of the person.
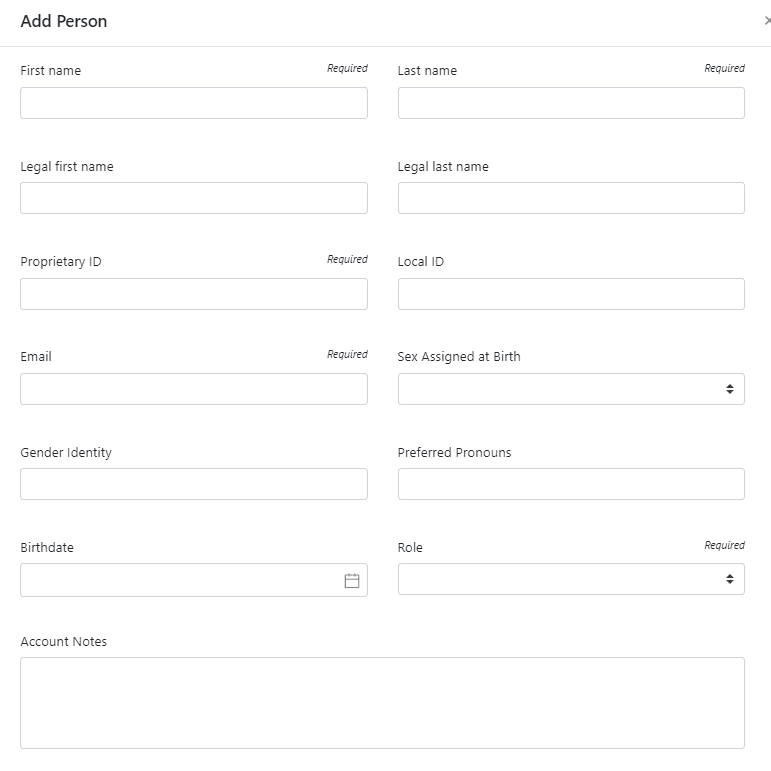
In the Add Person window you will be prompted to enter the following information:
| Field Name | Data Input Needed |
|---|---|
| First Name (required) | Preferred first name |
| Last Name (required) | Last Name (required) |
| Legal First Name | The first name of the person that is recognized on official records |
| Legal Last Name | The last name of the person that is recognized on official records |
| Proprietary ID (required) | The Proprietary ID is a unique numeric ID that is associated to a person record within the Source system and is used to match the person within the source system to the person in clevr. If the User Account will be managed within clevr, and does not exist within your source system, we recommend that 999 is added to this field and the clevr Managed field is set to True. |
| Local ID | The Local ID is a unique ID that is associated with the person. If the Source System does not have a Local ID associated to the person, the Proprietary ID is used to match the person in the Source System to the clevr record. If the User Account will be managed within clevr, and does not exist within your source system, we recommend that 999 is added to this field and the clevr Managed field is set to True. |
| Email (required) | The email address of the person record/user account |
| Sex Assigned at Birth | The sex the person was assigned at birth (male, female, not specified) |
| Gender | Person’s gender (male, female, not specified) |
| Gender Identity | Person’s gender identity |
| Preferred Pronouns | The pronoun that the person prefers to be used when they are referred to |
| Role (required) | Determines the level of access the user has in clevr. Use the Role dropdown menu to assign a role to the user. |
| Account Notes | Allows you to add additional details about the person record/user account for informational purposes. |
| Locations | Allows you to select which locations the user will be able to access upon login. |
Under the Locations Header select the locations that the user will have access to when they log into clevr. You will only be able to adjust locations for manually managed persons. If the role is automated (manually managed is false) you will need to adjust the user’s locations within your automation source system.
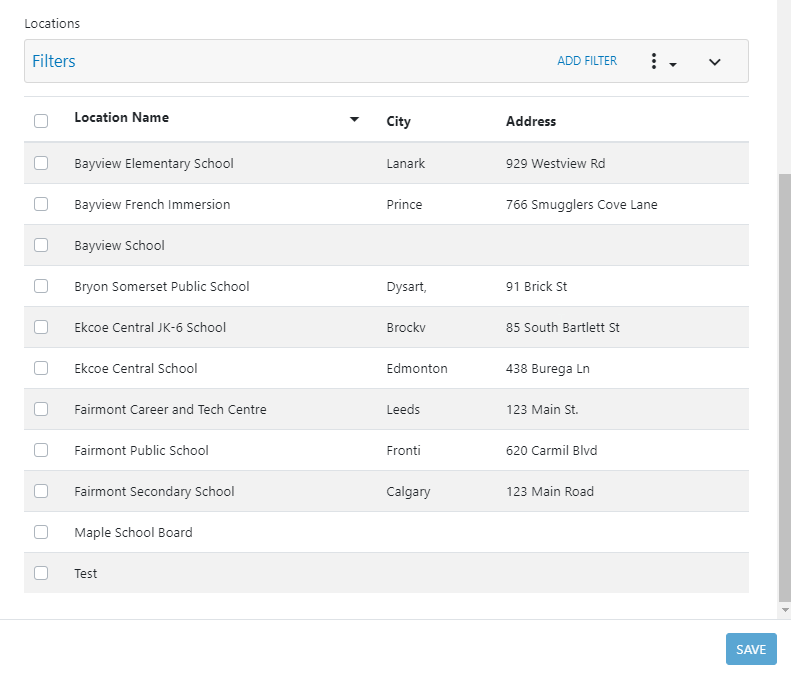
Clicking on the checkbox beside each location will assign the user account to that particular location. Click Save when you have added in the above information.
Person Management – Person Details
To view account specific details, locate the person record that you wish to view using the Person Search Card and applying the necessary filters
to locate the person record.
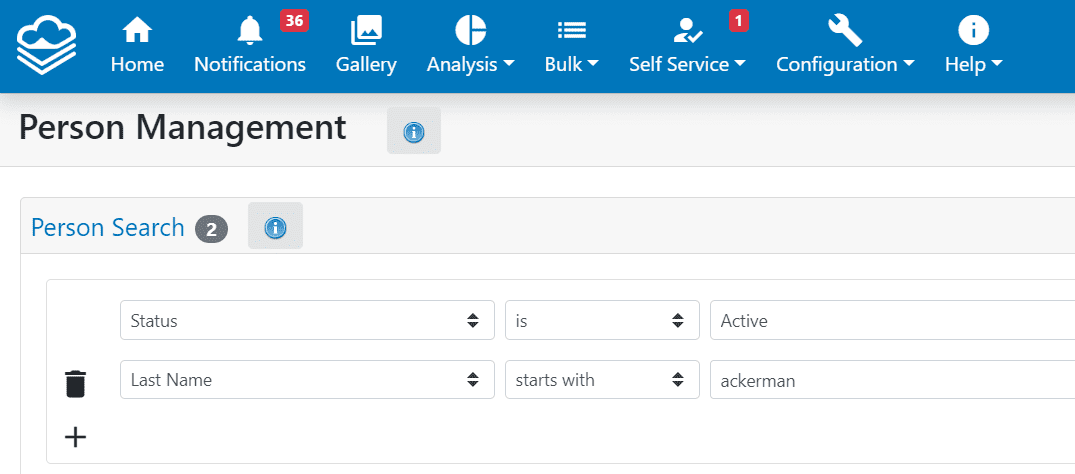
Click on the Last Name of the person record that you wish to view. This will open the Person Details Card displaying the following:
- Person Details
- Roles/Locations
- Account Details
- Form Access
- Linked Accounts

Updating the Person Details Card
To update the Person Details Card, click on the Edit button in the top right of the Person Details header:

This will open the Edit Person Screen where you will have the ability to update details of the person’s account.
Once you have completed updating the Person Details, click Save.
Included in the Person Details Card is the option to add or change the profile picture within the person record. To add or change the profile picture, click on the Change Picture button located at the top right of the Person Details Card.

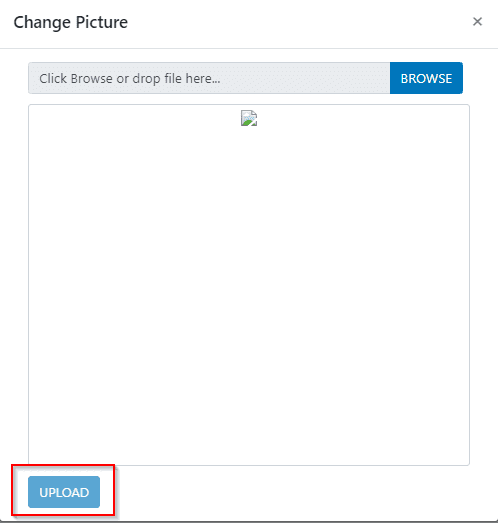
In the Change Picture Window, click Browse to select the image you would like to upload. Next, click the Upload button to save the image to the person record.
Roles/Locations Card
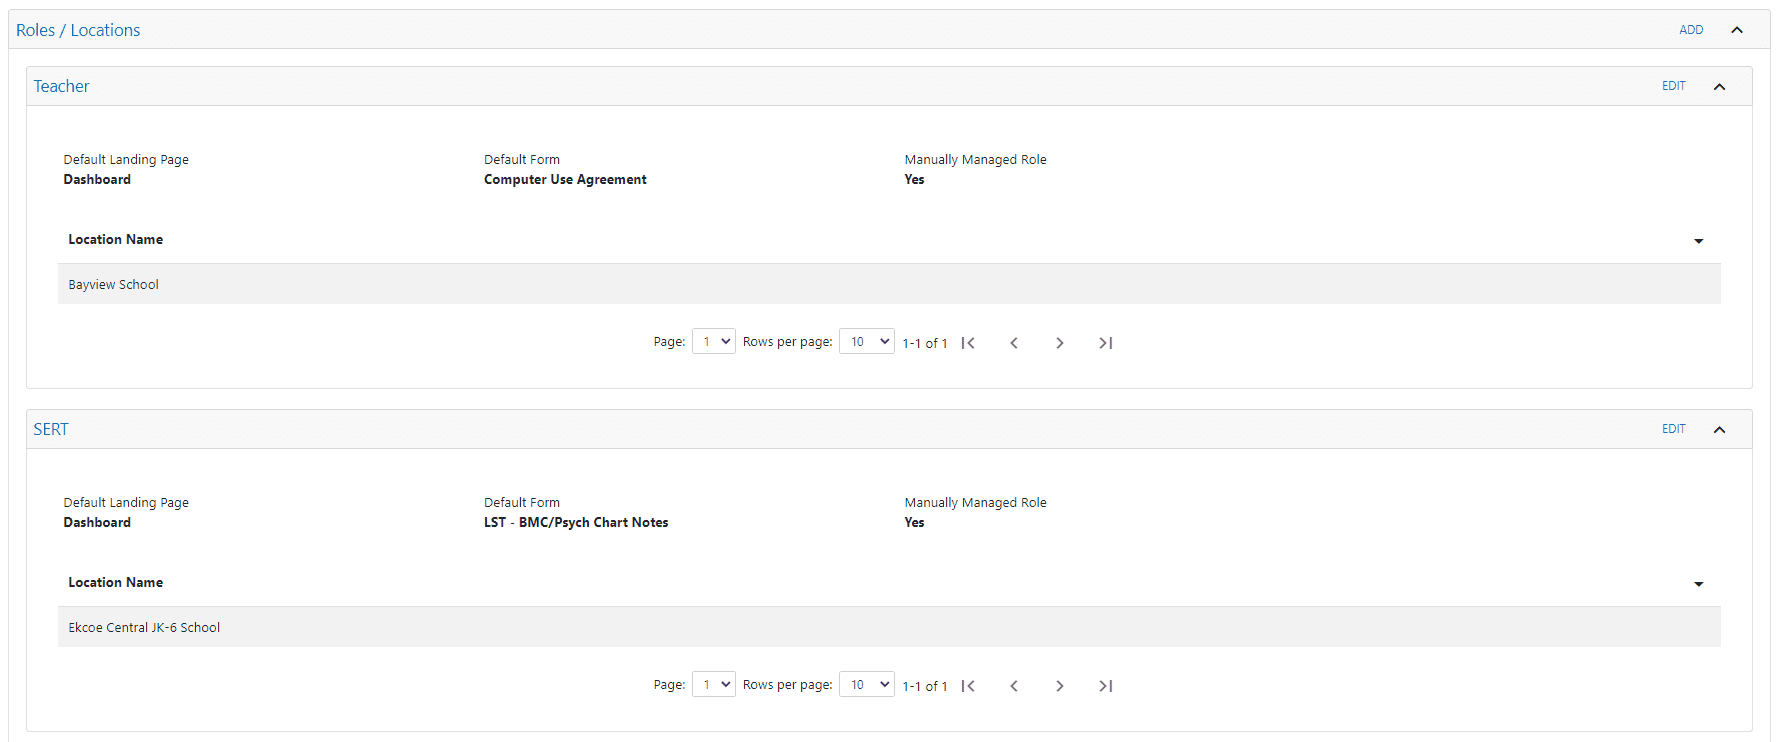
Different cards will appear under the Roles/Location Card for each role that the user account has.
Editing Roles and Locations
Click the Edit button to change the role or location present within the user account:

This will open a pop up window. Within the popup you will be able to update some information for the user account:
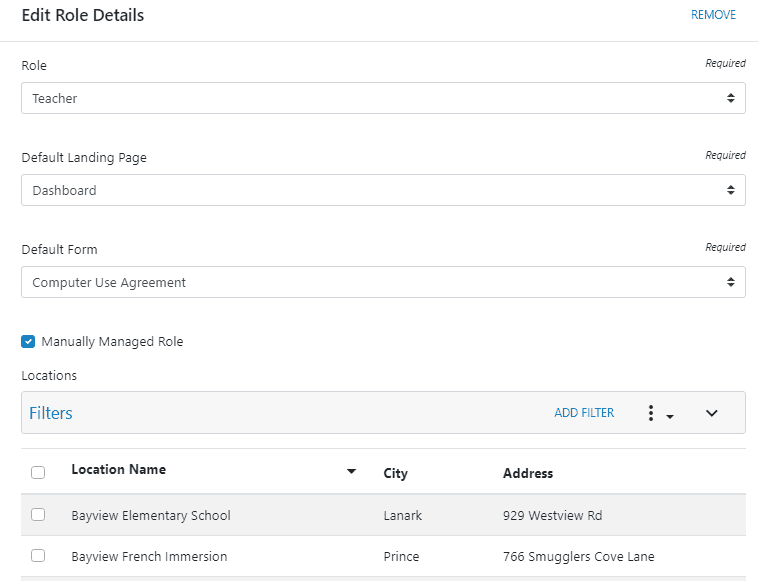
| Field Name | Field Description |
|---|---|
| Role | Determines the level of access the user has in clevr. Use the Role dropdown menu to assign a role to the user. |
| Default Landing Page | Identifies the user’s default landing page. This is the landing page the user will see when they log into clevr (example, Legacy, Legacy Dashboard, Any New Dashboard, Dashboard Template: (Name of Dashboard). |
| Default Form | Identifies the user’s default form. The default form is what will appear on the Dashboard when the user logs into clevr for the first time. The dashboard has “memory”, so if a user has previously logged into clevr, they will be returned to the last form they had selected. |
| Manually Managed Role | This setting determines whether the role is automated (details, role, and locations updated by the automation process from your source system) or manually managed where updating the account details, role, and locations is manually maintained. Manually managed = no means the role is automated, manually managed = yes means it is manually maintained. |
| Location(s) | The locations heading will only appear if “manually managed role” is checked. This controls the locations that the user has access to. |
How Default Location Works
Previouly you were able to select which default location the user landed on upon login. Default location is no longer something that can be manually adjusted.
If a user is logging in for the first time, default location will be the first location that they have access to. If a user has previously logged in, the location will now have “memory”. A user will be returned to the last location they had selected during their last login. This includes all locations.
Adding a New Role If You are Using Multi-Role
If your tenant has been configured to support Multi-Role, you can add as many manaually managed roles and locations to a user account as you’d like!
Click the Add button within the Roles/Locations card:

Follow the steps noted within the Editing Roles and Locations heading to add the roles and locations that you need.
Account Details Card

The Account Details Card helps to identify whether the person has a user account associated with it and includes the user’s account details. If this card does not have a username, it means you are looking at a person and not an account.
| Field Name | Field Description |
|---|---|
| Username | The username used to access clevr.
If your district uses third party login such as LDAP, SSO, or ADFS the clevr username is not used. |
| AD/SAM Account Name | The username used to access clevr for tenants using LDAP as the login method. If your tenant uses any other login method besides LDAP, this field will be blank. |
| Allow clevr Login (setting) | Identifies whether the account is authenticated by clevr or through third party login such as LDAP/SSO/ADFS /SSO. If this setting is set to “Yes”, the user account is managed by clevr and is able to bypass the third party login method. If set to “No”, the account is managed and authenticated through the LDAP/SSO/ADFS/SSO integration. |
| Force Password Reset | The Force Password Reset option will prompt a user to reset their password upon their next login. This is generally used for newly created user accounts so that the user can create their own unique password when they first log into clevr.
This feature cannot be used with user accounts that are configured with third party login such as LDAP /SSO/ADFS/SSO. This is strictly used for accounts that use a clevr login. |
Updating the Account Details Card
To update the Account Details Card, click on the Edit button in the top right of the Account Details header:

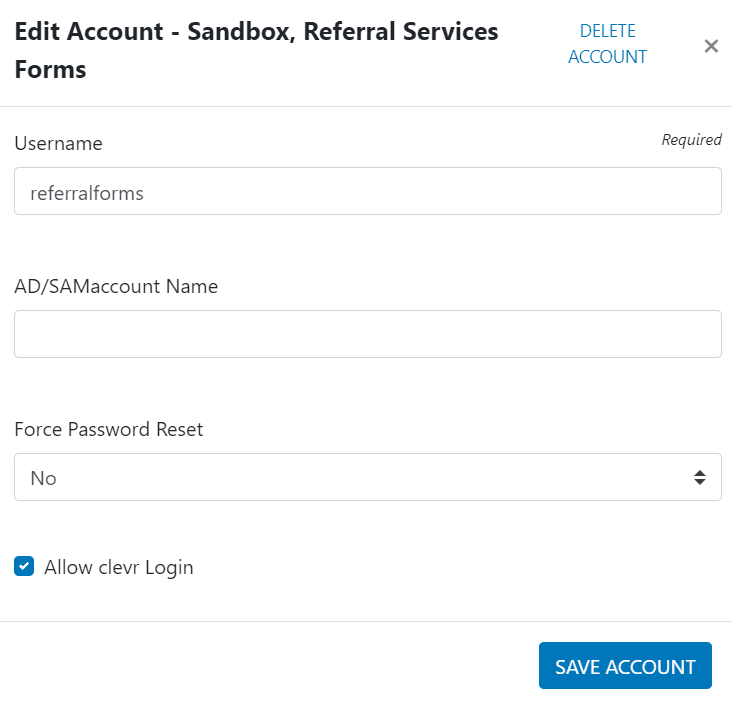
This will open the Edit Account Screen where you will have the ability to update the person’s user account details:
| Field Name | Field Description |
|---|---|
| Username | The username used to access clevr.
If your district uses third party login such as LDAP, SSO, or ADFS the clevr username is not used. |
| AD/SAM Account Name |
The username used to access clevr for tenants using LDAP as the login method. If your tenant uses any other login method besides LDAP, this field will be blank. |
| Allow clevr Login (setting) |
Identifies whether the account is authenticated by clevr or through third party login such as LDAP/SSO/ADFS/SSO. If this setting is set to “Yes”, the user account is managed by clevr and is able to bypass the third party login method. If set to “No”, the account is managed and authenticated through the LDAP/SSO/ADFS/SSO integration. |
| Force Password Reset * | The Force Password Reset option will prompt a user to reset their password upon their next login. This is generally used for newly created user accounts so that the user can create their own unique password when they first log into clevr.
This feature cannot be used with user accounts that are configured with third party login such as LDAP /SSO/ADFS/SSO. This is strictly used for accounts that use a clevr login. |
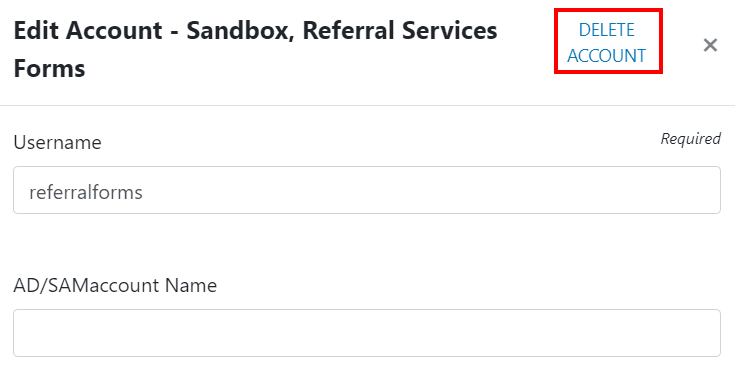
| Delete Account | This button is only present within the edit account details screen. If you wish to delete the user account you can click this button. The ability for the person to log in will be removed with this action, however the person will remain. |
Once you have made your desired changes, click on the Save Account button to update the account details.
Deleting a User Account
You can delete a user account within the edit screen of the account details card. If you wish to delete the user account you can click the Delete Account button. The ability for the person to log in will be removed with this action, however the person will remain.
Resetting a Password
This section only applies to districts who are NOT using third party login with clevr – AD/LDAP/ADFS/SSO.
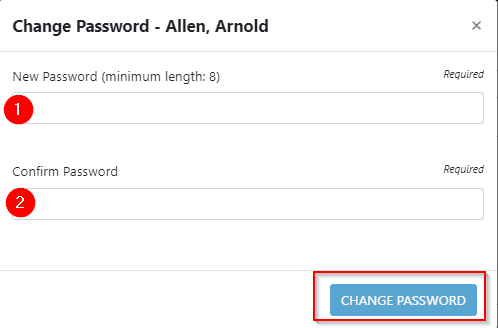
If the user has forgotten their password or is requesting a new password, you can create one by using the Reset Password button located in the top right of the Account Details Card.

In the Change Password window, enter in the new password into both the New Password and Confirm Password fields and click Change Password.
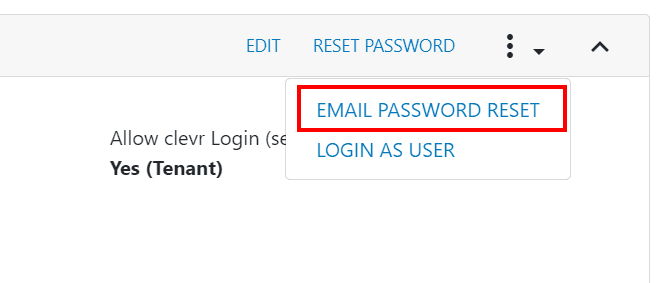
You can also choose to send the user a Reset Password Email. Selecting this option will send an email to the user’s email address and allow them to reset their password using the clevr login portal.
Log In As User
The Log In As User Feature adds the ability to log into a user’s account to troubleshoot any issues that the user may be experiencing.
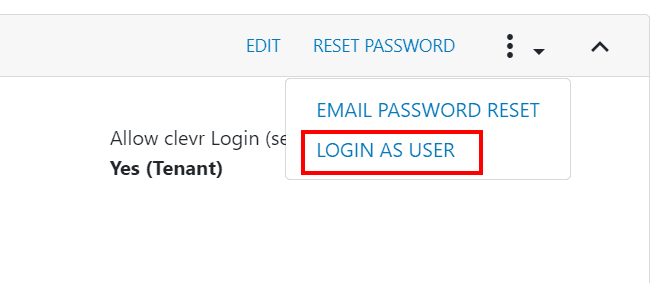
When this option is selected within the Person Management module, clevr will proceed with logging in as the user that you have selected, so that you can view what is available within their account. You will be logged into their live user account, and any changes you make will be tracked under the name of the user that you’ve logged in as.
When you are finished with the session, you will need to log out of clevr and log in using your account credentials to proceed with updating the user account (if any changes need to be made).
Form Access Card
The Form Access Card provides an easy way to identify the Forms that the user has access to.

The Form Access Card will provide both the name of the form and the location where the form can be created, modified, and accessed by the user. When the role is changed within the user account, the forms that the new role has permission to will be automatically added to the forms card and they will lose access to the forms their old role had.
Using the Search Filters in the Person Management Form Access Card
If the user has multiple forms associated to their account and you are trying to find whether they have access to a specific form, the Add Filter option can be used to narrow down the results that are displayed on the page.
To filter the forms list, click the Add Filter button.

You will then be prompted to create a filter. From the Dropdown menu you can filter by either Form or Location:

To add additional fields to your search click the “+” icon. If you wish to remove a field, click the “Trash Can” icon next to the field that you would like to exclude.
Once you have entered in your search criteria, click the Apply button located in the top right hand corner of the Form Access Card. clevr will generate a list of results based on the search criteria you have entered.

Providing a User with Access to a Form
The Forms Access Card allows you to grant permissions to a specific form by clicking on the Add Access button in the top right hand corner of the Form Access Card.

In the Add Form Access window, select the form that you want to associate to the user by using the Form Dropdown menu. After the form has been selected, click on the location(s) where the form will be available to this user.
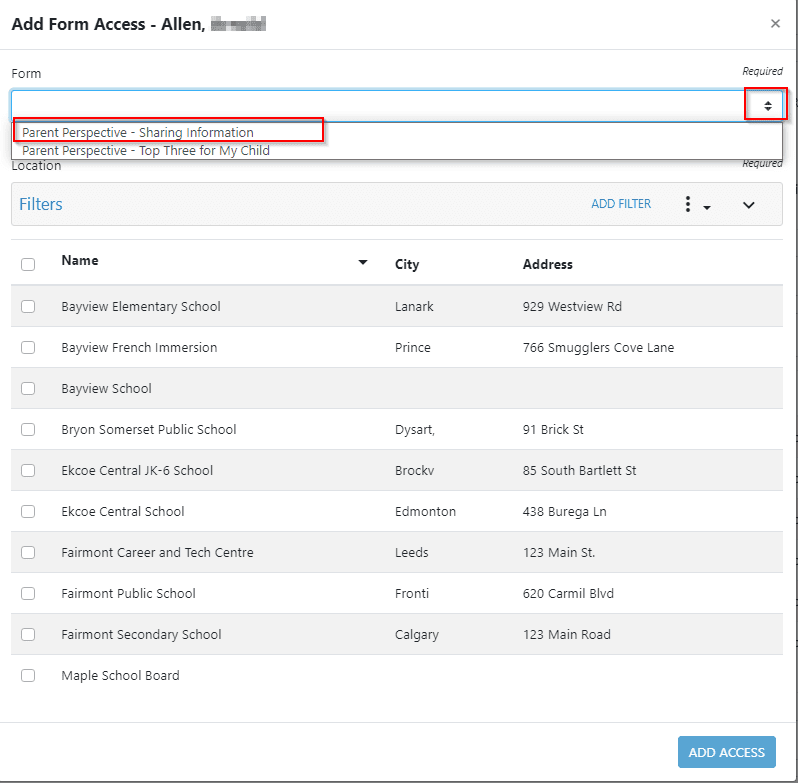
Click Add Access to apply your updates to the user account
Removing a User’s Access to a From
The Forms Access Card allows you to remove permissions to a form when the user no longer needs access. To remove access to a form, click on the form name within the Form Access Card to view its details:

In the Edit Form Access Card, click on the Remove Form Access button to prevent access to the form for the user
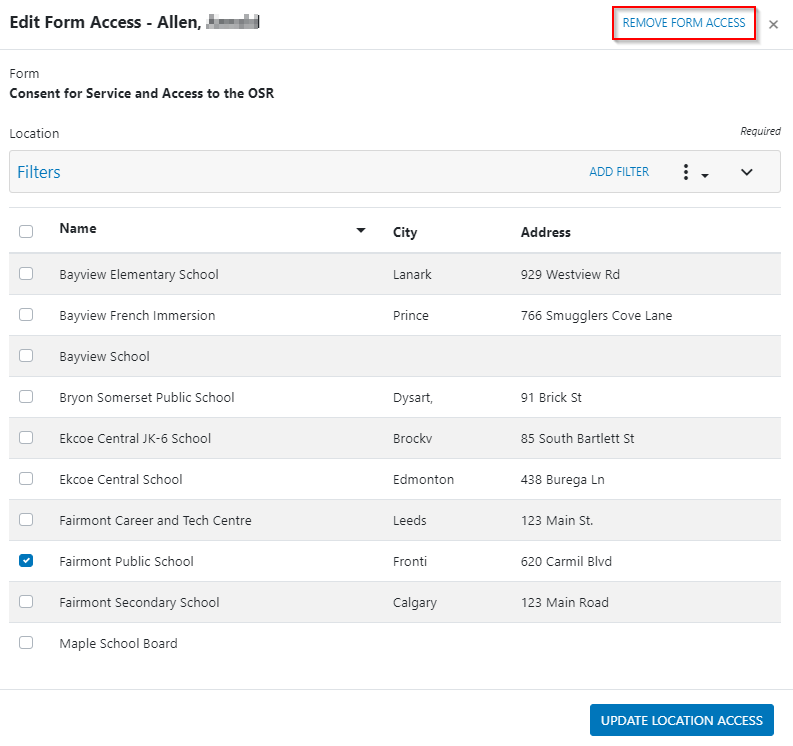
clevr will prompt you to confirm deleting access to the form. To complete this action, click the Remove button.

