Advanced Search allows you to build a custom report from your data by choosing the form, filtering your data by categories, and selecting data that you would like to appear in the search results.
Select the Analysis button located in the top right menu bar on the Homescreen. Within this menu you will find the Advanced Search option which will direct you to the Advanced Search module.

-
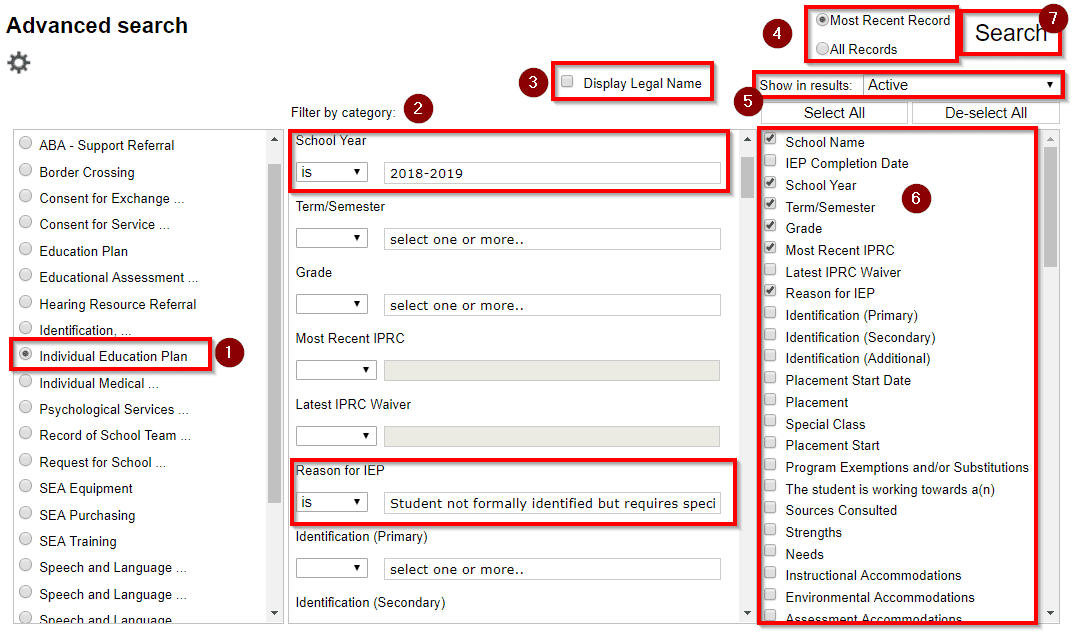
In the left column, select your form.
-
The center column is used to filter your list of students. For example, if you are looking for records from the 2018/2019 school year, you would select School Year > is > 2018/2019. This column is optional.
-
If you would like the legal name to be displayed within your results, check this checkbox.
-
You can toggle between incorporating only the most recent record that fits your parameters or all records that fit your parameters. Note: If you select all records you may notice duplicates (the same student/staff member appearing multiple times) in your search results if there is more than one record with those parameters.
-
Choose whether to search the records of:
-
Active students (students currently enrolled in the school / district)
-
Inactive students (students who have left either a school or the district / division; a student can be both active at one location and inactive at another. For this reason, if you are seeking students who have left the district / division completely, use the “transferred out” status.)
-
Pre-registered students (students who have been added to your SIS with a start date in the future)
-
Transferred Out students (students who have completely left the district / division and are not registered at any schools within it)
-
Any combination of the above by using the multi-select function within this dropdown
-
-
The right hand column is used to control which headings appear in your report. You have the option of Select All or De-select All, or you can manually select which headings you would like to appear in the results.
-
After all your Advanced Search settings are in place, press search to be taken to the results.

Pressing Search in the above step will bring you to the Advanced Search results screen.
-
If you made a mistake in the input screen, select the [Refine Search] hyperlink above the search results. This will take you back to the Advanced Search Input Screen shown above. Your filters will be remembered.
-
To open the specific record being referenced in the results table, click the pencil icon.
-
Search results can be copied from clevr to be pasted into your word processing or spreadsheet software of choice (such as Microsoft Word or Excel and Google Docs or Sheets). From the main screen click the Copy button on the upper left side of the page. Your search results will be copied to your computer’s clipboard and can then be pasted into another Word or Text document by choosing paste or typing CTRL V while in that application. Search results can also be saved as a CSV or PDF file. Click the Save button and choose either Excel or PDF and you will be prompted to save the file.
-
You now have the ability to customize the layout of your report. You can do this by clicking and dragging the column headers to the desired location, sorting each column alpha-numerically, or simply stretching and condensing the table.

Note: Only fields that have been flagged as “searchable” will show up in the Advanced Search screen.
Saving a Search & Accessing Saved Searches
Searches can be saved so that you do not need to enter your filters / parameters each time you need to run it. From the Advanced Search Results screen, enter a name into the field shown below and click “Save As”.

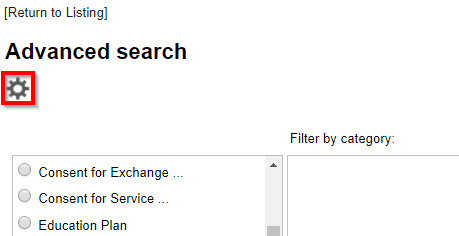
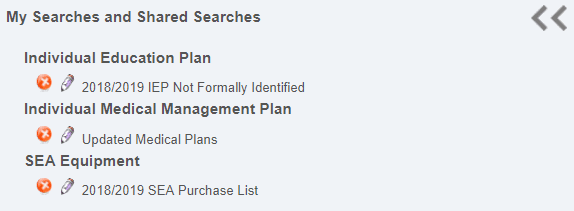
Your Saved Searches can be accessed via clicking on the gear icon found within the Advanced Search input screen. This will open a slide out menu with your Saved Searches and Searches that have been shared with you.


To run a Saved Search, simply click on the search name and it will take you to the results screen. To delete a search, click on the red X to the left of the search name in the Saved Searches menu. If there is no X beside the search name, this indicates that the search has been saved with you are you are not able to remove it.
To modify a search, click on “Refine Search” found above the results table. From here you can change your parameters, then press search. To save the newly modified search, simply press “Save As” with the same search name.
Sharing a Search
The clevr team must enable the ability for you to share a search. This access right is granted per role, not per individual. In order to share a search, you must have already saved the search.
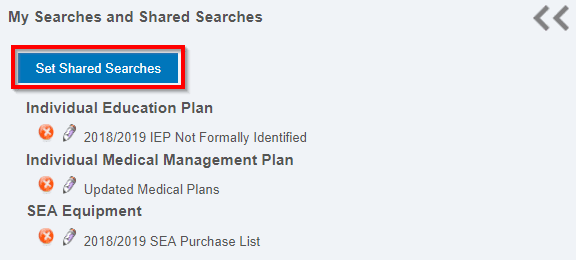
To share a search, navigate to the Advanced Search screen and click on the gear icon to open the Saved Searches slide-out menu. Within the slide out menu, select Set Shared Searches.

In the pop up window that opens, you can select which search you would like to save by changing the Search Name dropdown. When you have selected the search you would like to share, check the checkbox to the left of the role(s) you would like the search shared with, and press update.
The status column will say either “Shared” or “Not Shared” to indicate if the search has been shared with a particular role. To unshare a search, simply uncheck the checkbox beside your desired role and press Update.

