Style Guide
Documentation Title sgrshrs gregsergsergh
Video
This video will explain and demonstrate the basic steps required to create a documentation post.
How to create a post
Post Meta
When creating a post, you should make sure that it has at least one of the following categories:
- Editor Documentation
- Editor Training
This will cause the post to be hidden from the main Help Centre page (https://weareclevr.com/help-center/) and visible in the Editor Documentation page (https://weareclevr.com/help-center/editor-documentation/), as well as applying the Documentation “page” layout.
No other configuration should be required.
Base Sections
Post Title
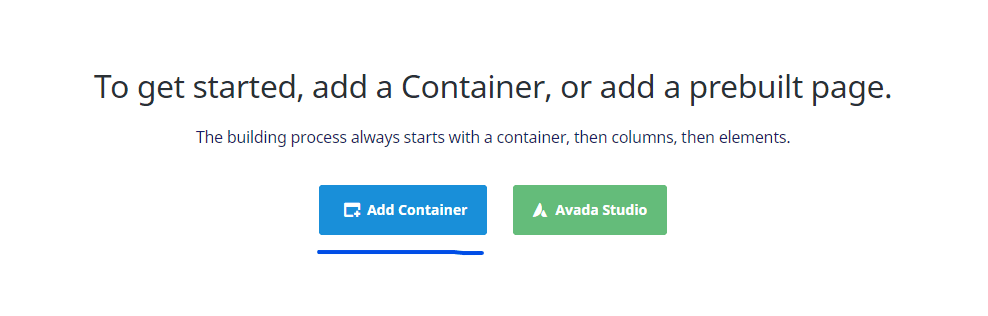
The page title should be created by clicking “Add Container”, then going to Library Containers > Documentation Title.
Change the text of the “Post Type” text block. The default should be as follows:
- “Editor How-To” for editor documentation
- “Administrator Documentation” for admin module documentation
- “End-User Documentation” for end-user documentation
Post Body
The page title should be created by clicking “Add Container”, then going to Library Containers > Documentation Body. This should create a section with a blue line on the top and a white background. Every page should have a single Documentation Body that contains all content for the post.
Titles
Titles in documentation should use the “Title” element type. There are 3 levels of definable titles, as follows.
Section Title <h2>
Level 1 Title <h3>
Level 2 Title <h5>
Level 3 Title <h6>
Title elements should used to create all titles, using the HTML Heading Size on the Design tab to set the title level.
Section Titles should have a margin top of 0 to make them align with the left section line. The header that comes in a section already has this applied.
No other modifications should be required, except possibly margin top to push the title away from the content above.
Text Blocks
The Text Block element should be used for all text content. The only modification required should be within the content of the text block. Only use styles and options that can be edited in the WYSIWYG editor.
Images
There are two ways of including an image in a post.
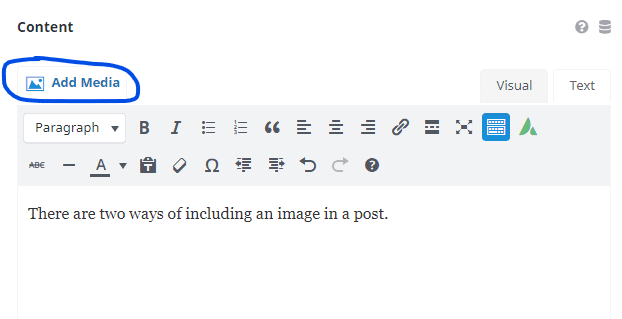
You can either Add Media within a Text Block element directly, as seen above this text…

… or as a separate Image element, as seen above this text. Either option is acceptable to use, depending on the situation.
When creating either image type, the 2px black border will be automatically applied.
Tables
Tables should be created using the Table element.
There are 2 different styles of table:
Style 1
| Attribute | Value |
|---|---|
| class | Lorem ipsum dolor sit amet consectetur adipiscing elit, nec nisi ac fringilla congue rutrum, sociosqu cras ante eros nibh placerat. Himenaeos primis vehicula lobortis taciti praesent, bibendum platea iaculis tincidunt. |
| onchange | Lorem ipsum dolor sit amet consectetur adipiscing elit himenaeos potenti lectus maecenas nibh porttitor euismod luctus, duis magnis massa taciti sodales mattis eleifend leo id montes curae cubilia placerat ut. |
| order | Lorem ipsum dolor sit amet consectetur adipiscing elit natoque eleifend mi, ligula convallis pellentesque ridiculus egestas nisl id vivamus tortor habitant, lacus lacinia viverra sem potenti semper molestie mollis tempor. |
This style of table should be used for Attribute and Value Tables with the columns:
- Attribute
- Value
The Value Description should include examples, and embedded code blocks
Style 2
| Column 1 | Column 2 | Column 3 |
|---|---|---|
| Column 1 Value | Column 2 Value | Column 3 Value |
| Column 1 Value 2 | Column 2 Value 2 | Column 3 Value 2 |
| Column 1 Value 3 | Column 2 Value 3 | Column 3 Value 3 |
This style of table should be used for all other table uses.
Code Blocks
To create a block of code, you should use the “Documentation Code Block” from the Library Elements tab.
No other modifications should be required, other than inputting the JavaScript code. All styles and options should be left alone.
The is a page that represents the current styling for editor documentation.