The Intensive Support Reports in clevr enables Division level staff to create a CSV file from their clevr Data that can be imported into Student Program Participation for Intensive Support.
Requirements for a Record to be Included
These requirements within the clevr record must be met in order to be included in the report. Values that do not match the requirements will be excluded from the report.
- School year on the General tab must be the current school year
- Intensive Supports on the Division Approval tab must have either “Occasional” or “Frequent” selected within the DROPDOWN (a blank value will cause the student record to not be considered)
- Student record must have more than just the School value in the General tab (record can not be empty, there must be data within the record)
- Record can be either active or locked
- Student must be active
Fields that will be Included
- Disability 1 must have a valid disability code selected (if required)
- Disability 2 must have a valid disability code selected (if required)
- The intensive supports “to” and “from” dates will be included
Accessing the Report
This report can be accessed only from the new Dashboard. If you have a different landing page please submit a ticket via our contact form here to request for your landing page to be changed. Before you run your report, you must perform the following actions:
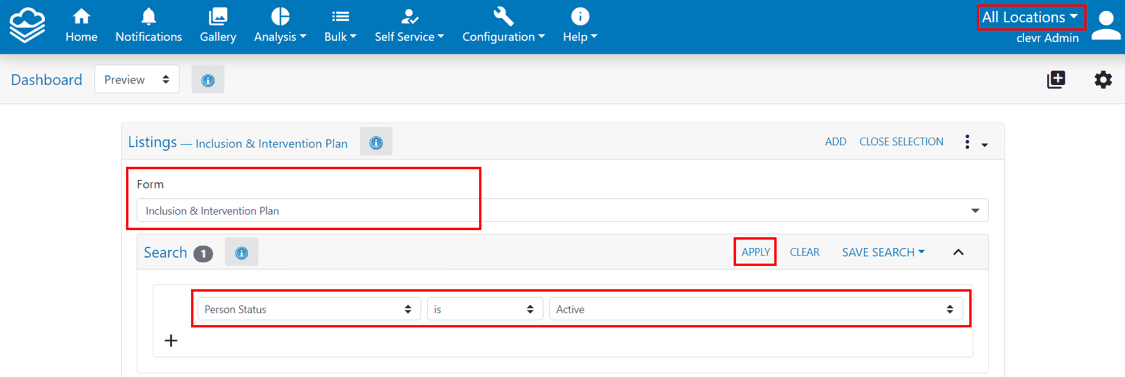
- Select the IIP within the Dashboard form dropdown
- Set your top right location dropdown to “All locations”
- Remove all filters from your IIP Dashboard Listing except:
- Person status > is > active
- Click apply to run your search
If you have configured your filters correctly, it will look like this:

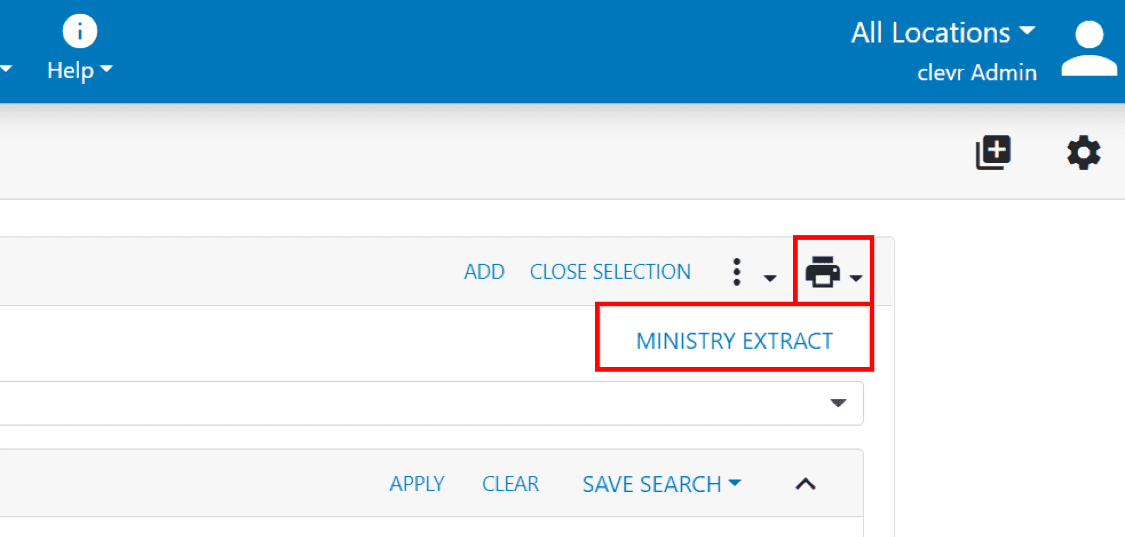
When your filters have been applied, click on the icon of the printer on the Dashboard Listings Card and select “Ministry Extract”:

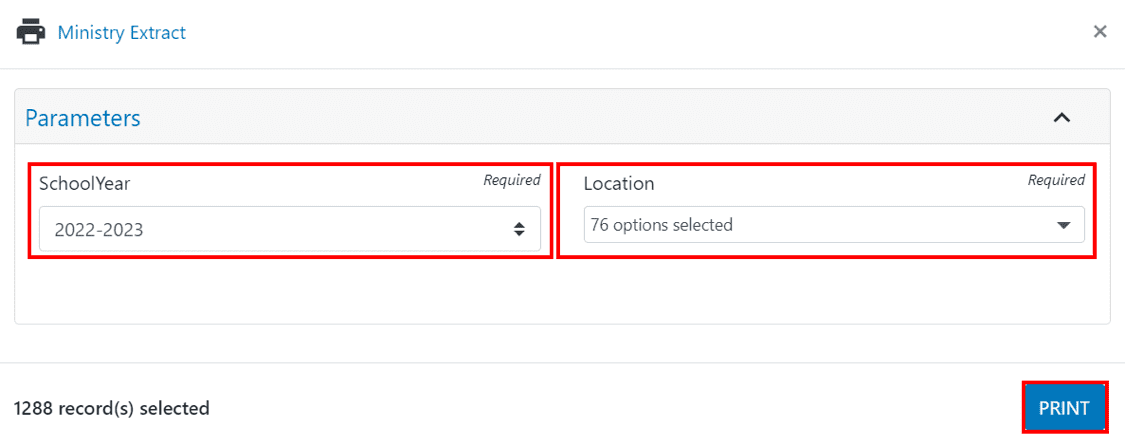
Within the pop up window, select the current school year and the location you’d like to perform the extract for. Divisions that wish to use all locations will have an option in the location dropdown to select this. The popup window will confirm the number of records that match the filters you have selected. Click “Print” to generate the report.

It will take a few moments to generate your report. Once processed, a new window will popup that will give you a preview of the data that will be included within the CSV file. To download the CSV file click on the icon that looks like a save button and select CSV. The file will be downloaded to your computer.

Once downloaded to your computer, you can import the file into MSS.
This document will walk you through how to import the intensive support CSV into MySchoolSask.
