| Table of Contents |
Groups and Classes Module
Overview
The Groups and Classes module allows you to add and manage custom groups within clevr. It also gives you a view of classes that have been imported into clevr by your SIS (Student Information System) integration.
The Groups and Classes module is a great tool for administrators to view users’ Teacher/ Class alignment that has been transferred to clevr from the source SIS.
| Page rights To access this feature, the Groups and Classes page right is needed. |
| Common usage This feature is used to view classes that have imported into clevr from the Student Information System, to create custom groups, and to create and monitor supervisory relationships . |
| Considerations This feature is best suited for system administrators, not end users. |
Accessing Groups and Classes
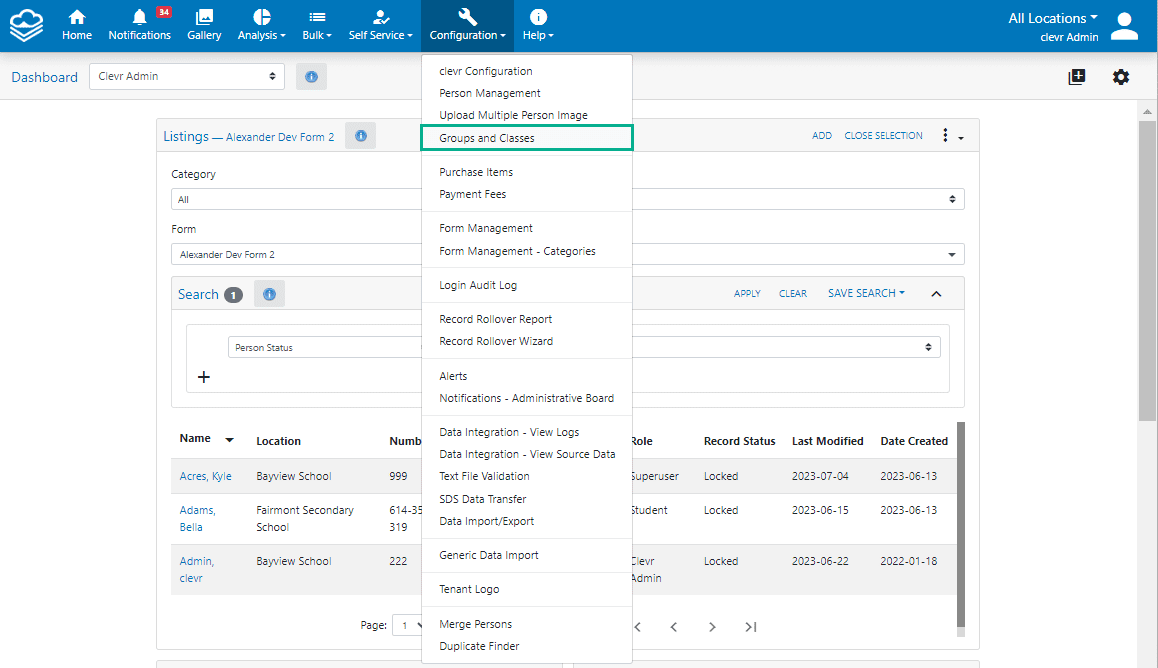
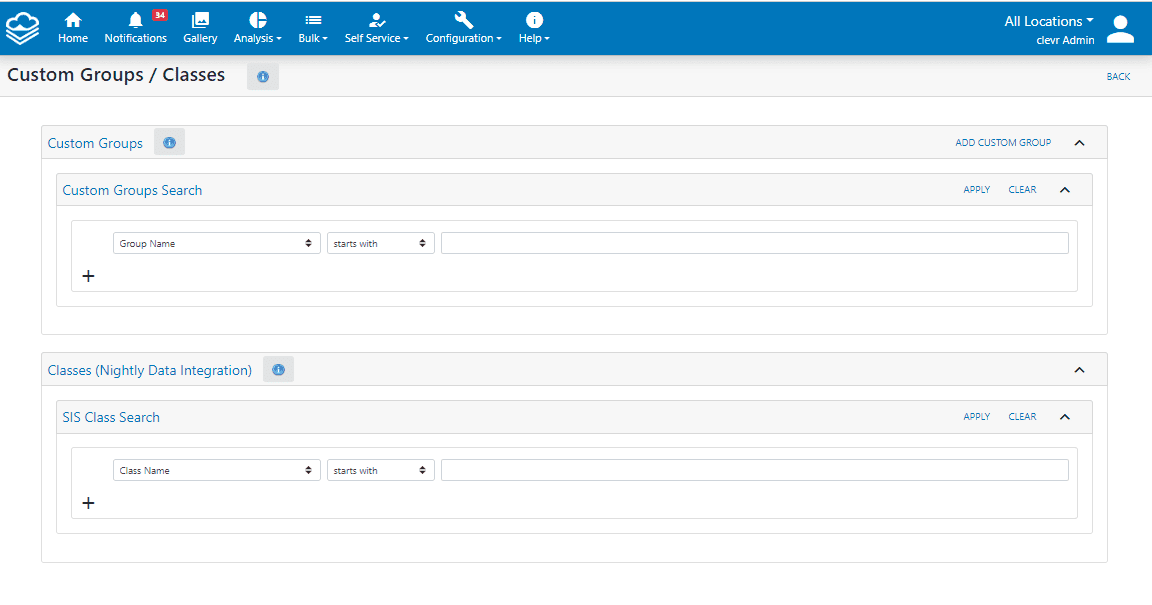
Groups and Classes can be accessed by selecting the Configuration menu > Groups and Classes.
Creating a Custom Group
To create a custom group, click on the Add Custom Group button found within the Custom Groups section:
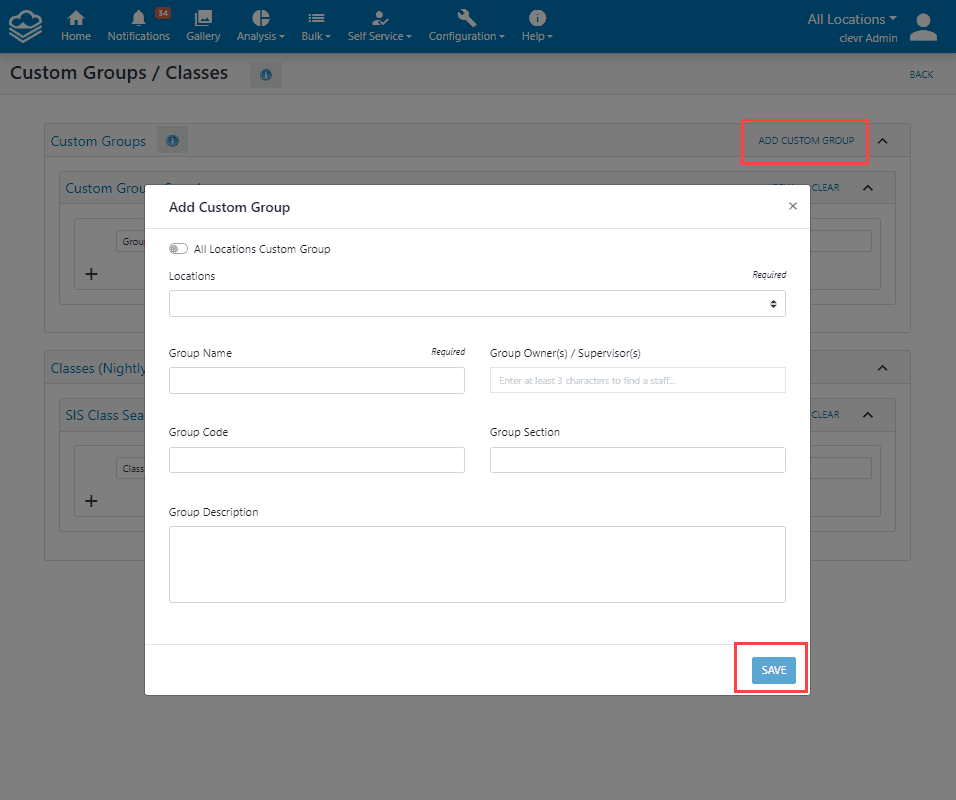
In the Create Group pop-up window, you will be prompted to add the following details:
-
All Locations Custom Group: If selected, this group will be created at all locations.
-
Locations: This is the location/school the group members are associated with.
-
Group Name: The name of your group or the name of the staff member that the group is being created for.
-
Group Code: Create a group code or unique identifier for your group (optional).
-
Group Owner(s)/Supervisor(s): The individual who is the head of the group.
-
Group Section: Create a group section (optional).
-
Group Description: A short description to include specific details about the group such as the date you created it.
After you have completed adding the group details, press the Save button.
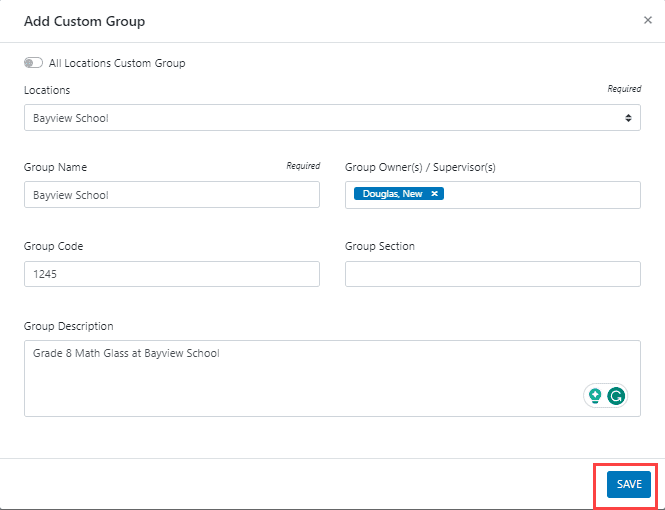
After saving, a new page will appear called Custom Groups / Classes. On this page, you will see the detailed information entered previously. As well, you will have the ability to Edit Custom Groups, Add Group Members as well as Remove Group Members.
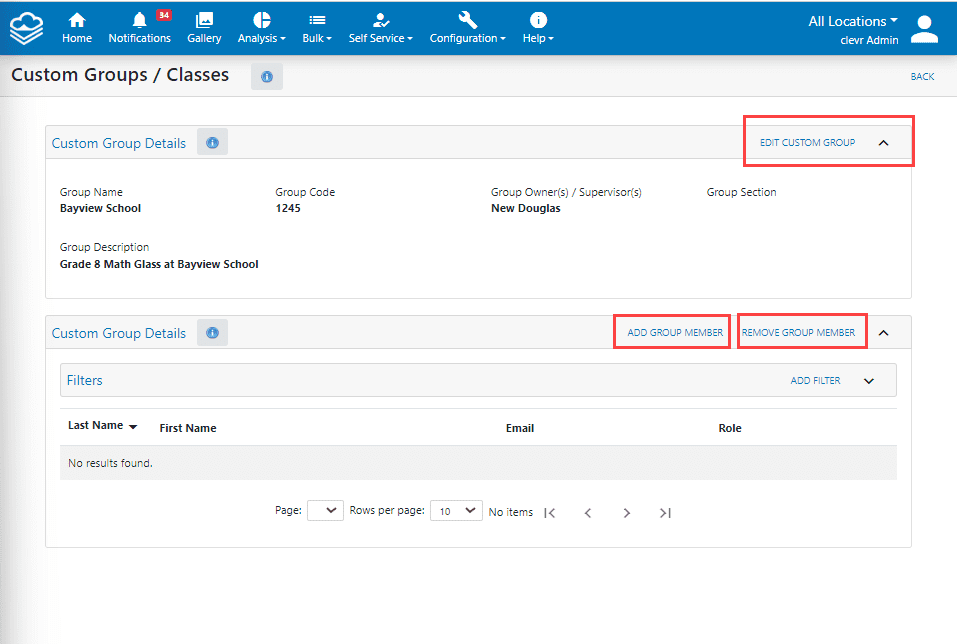
Adding and Removing Members from your custom group
To Add members to a group, click on Add Group Member. From there you can use the filter button to narrow down your search and search by the following options:
-
Last Name
-
First Name
-
Email
-
Role

Then select the individual(s) from the list that you want to join to the group. If all persons should be selected, click the checkbox found at the top of the header column.
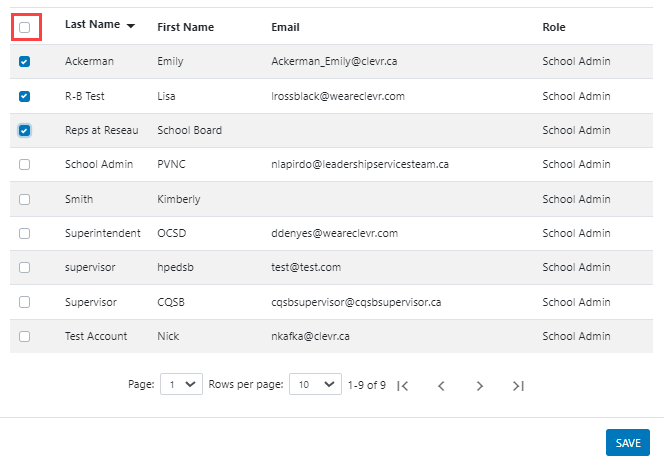
Once done, click Save and then hit the X button at the top of the Add Group Member screen to close the window.

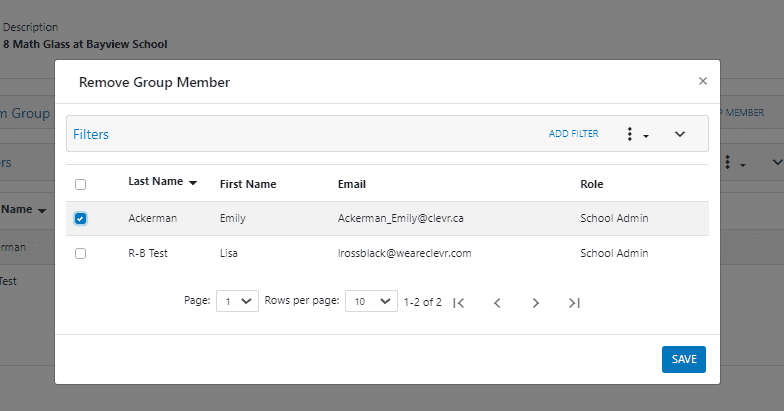
To Remove a group member, click on the Remove Group Member button and select the user(s) to remove from the group, then click Save. If all members should be removed click on the checkbox in the column heading. To close the window, click the X button in the popup window.
Deleting a Group
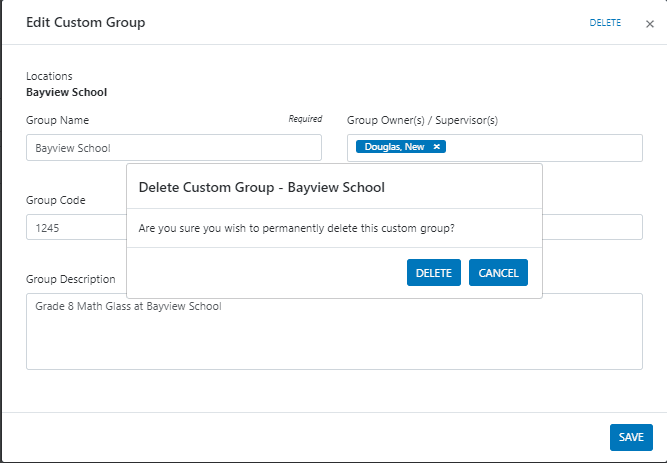
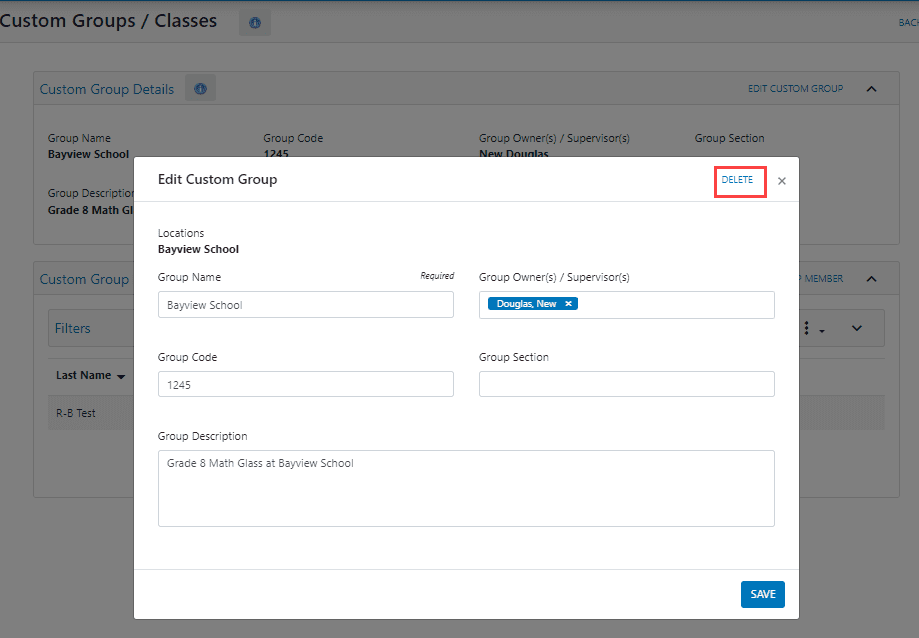
You can delete a group by clicking on the Edit Custom Group button. Within the popup, click the Delete button.
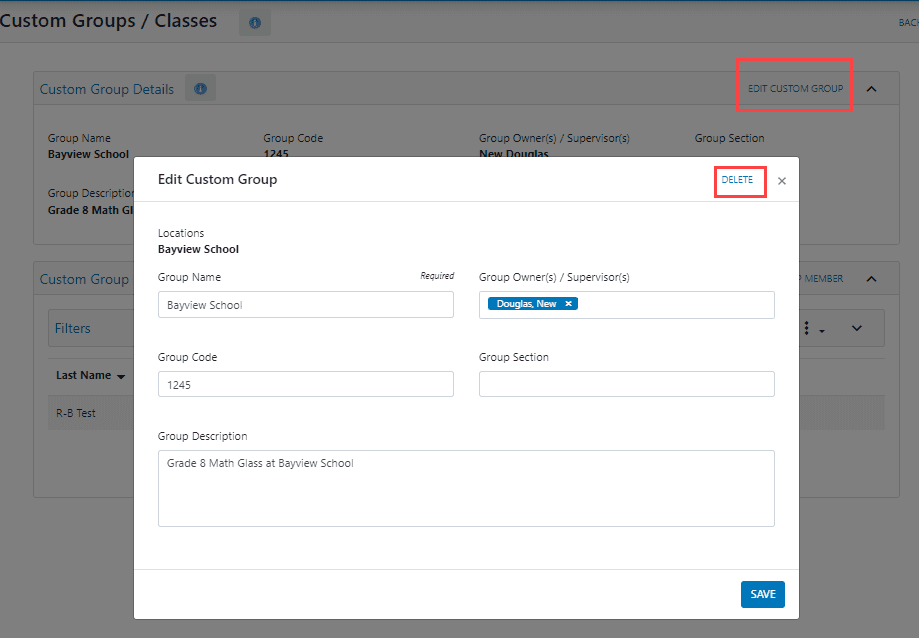
Another popup will appear to ask you to confirm the deletion. Once Delete is clicked, users will be brought back to the main Groups and Classes page.
Searching for a Custom Group
A Group can be searched for using any of the following filter criteria:
-
Group Code
-
Group Section
-
Group Name
-
Group Description
-
Member First Name
-
Member Last Name
-
Owner First Name
-
Owner Last Name
-
Location
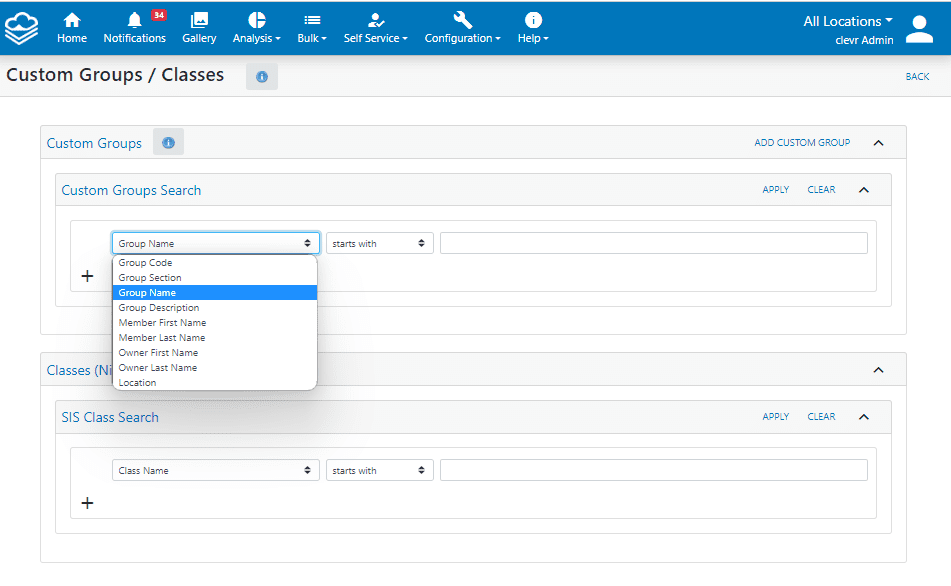
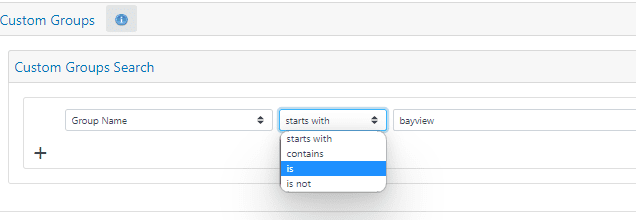
Paired with sub filters:
-
Starts with
-
Contains
-
Is
-
Is not
Once a search has been completed, results yield as follows. Users can add more than one filter option to narrow down their search.
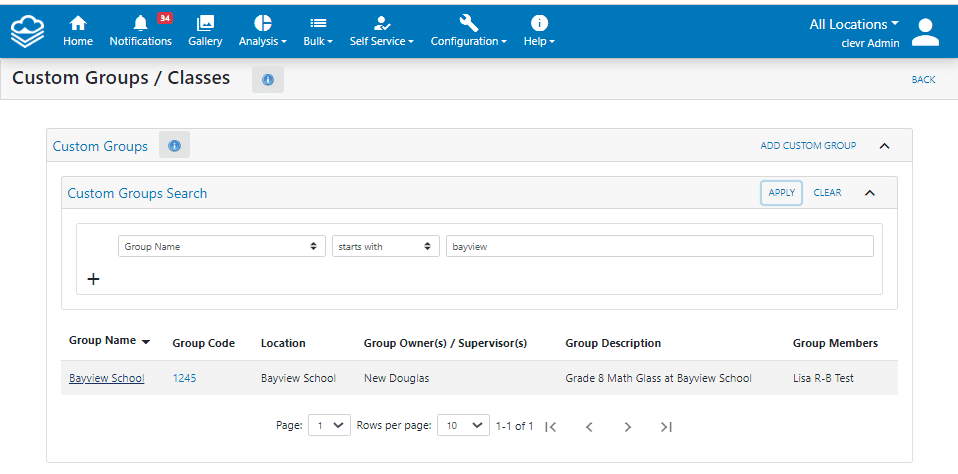
Select the Group you were searching for to be taken to the group’s page details for further updates/information. Once completed, click the back button to return to the main groups and glasses page.
SIS Classes
To view classes that have been integrated into clevr from your Student Information System, select the Classes (Nightly Data Integration) tab in the Groups and Classes module.
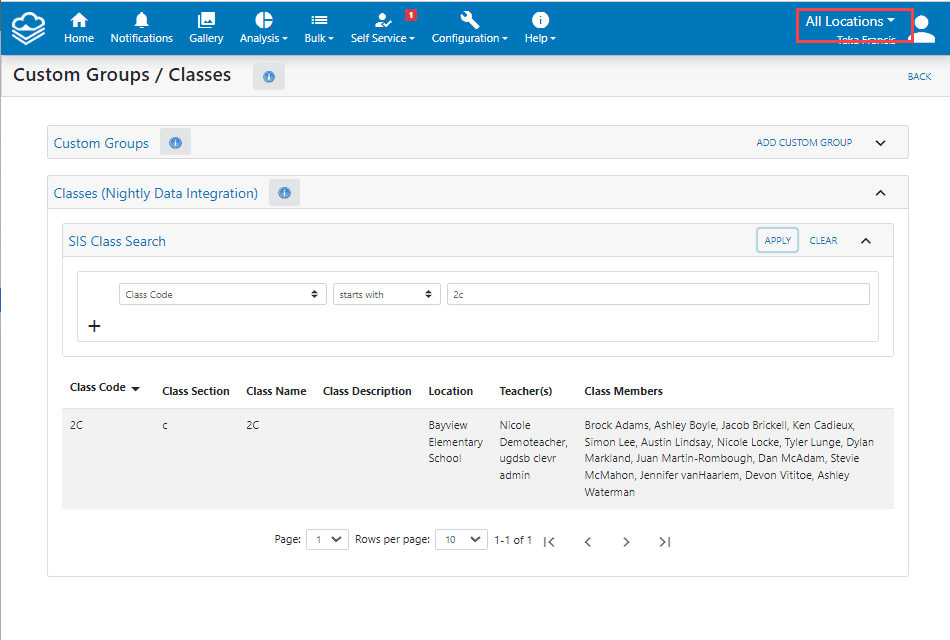
In the search window select the filter options desired and hit Apply to see the results.

To view staff and students associated with a SIS class, look in the column headings. Teacher data can be found in the Teacher(s) colum and Students in the Class Members column.

